Soil testing, not too many people know about this little trick, that can really make an enormous difference to the health of your plants. If you have the perfect soil, your plants are going to grow quickly and beautifully. Today we’re going to talk about how to use a soil testing kit, to ensure your soil is the best it can be. As we all know, without good soil your plants will spoil!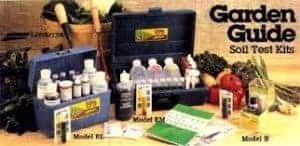
The main nutrients plants need are nitrogen for vegetative growth, phosphorous for root and flower development, and potassium for vigour.
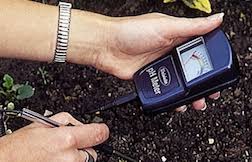
To get the best results, obviously lab testing is the most accurate way to find out what’s in your soil, but home kits are a great way to monitor the effects of your fertilisation.
Firstly, you need to make sure you have a good sample. To take the perfect sample you want to use a clean stainless steel trowel. Take several samples from the same area, making sure you go 6 to 8 inches down in depth, and mix the samples together. Avoid touching the soil with your bare hands, its best to use gardening gloves. Put the soil in a clean plastic or paper container. Do a soil test for each different area - for example, one separate test for the raised beds. Spread the soil out on a sheet of dry paper and let it dry for about 12 hours.
 Once your soil is dry, its time to start your test. Crush the soil and sift it through a sifter or a screen to get an even texture. Make sure to remove any debris or rocks.
Today I'll be using a LaMotte soil testing kit, which I will talk more about where you can purchase later on. Make sure you read the instructions first. Safety is really important, and the chemicals can be pretty harsh! So make sure to always wear safety goggles and gloves.
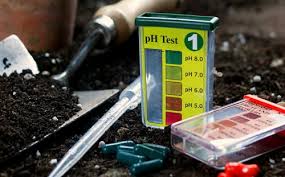
First we’ll do the PH tests. Fill one of the test tubes to the fourth line with the PH indicator. Use the 0.5 gram spoon and add 3 scoops of soil. Put on the cap and shake gently for a few minutes. Then set the test tube down for twelve minutes and all you have to do now is wait! Go and make yourself a cup of tea or prune your rose bush!
Now it's time to compare your pH to the colour chart. To get an accurate reading of the colour chart, make sure to stand with the sun behind you and hold the test tube about half an inch in front of the colour chart. The optimum pH balance for plants should be between 5.5 and 7, but a little under or over should be fine.
 Now onto the nitrogen testing, take a clean test tube and fill to line 7 with the nitrogen extracting solution. We’re going to add 3 scoops of soil again. Shake gently for one minute. Remove the cap and let it settle. Once its settled use a clean pipette to move the clear liquid to another clean test tube up to line 3, be careful not pull up any soil. Add 2 x 0.25 gram scoops of the nitrogen indicator powder. Pop the cap on, mix gently and wait for a pink colour to develop. The nitrogen test indicates whether there are traces of nitrogen in the soil. Nitrogen is an important nutrient so it is good to have at least traces show up in the test.
Now for the phosphorus testing. Pretty much the same procedure as the nitrogen test, fill up the test tube to line six with the phosphorus extracting solution. Put in three scoops of 0.5 grams of soil, gently shake, and let settle. Again, remove the clear liquid into another test tube and add 6 drops of the phosphorus indicator reagent. Cap on and mix, then add one phosphorus tablet. Mix till the tablet dissolves and the liquid turns blue. A darker blue, means excellent levels of phosphorus! Hooray!
 The last nutrient I’m going to test is the potassium. You know the drill by now. Fill a clean test tube to line 7 with the potassium extracting solution. This time I’m going add four scoops, and then shake vigorously, allow it to settle and move it to a clean test tube with a pipette. Add a potassium indicator tablet and mix gently and until the tablet dissolves and the liquid turns purple. Add the potassium solution one drop at a time. Mix in-between the drops, and keep track of how many you’ve put in. Stop adding drops when the liquid goes form purple to blue. I added 24 drops to get the potassium colour light blue, which means I’m pretty low on potassium.
Fortunately the LaMotte test kit comes with three amazing guides, that you can read to determine what to do next after taking your soil readings.
For me, this test kit is super simple to use, has easy to follow instructions, and has provided me with accurate results every time.
You can purchase soil testing kits from most reputable garden centres or plant shops. I purchased my LaMotte testing kit online direct from Amazon.
So, what’s stopping you! Do a soil test and be on your way to having lovely healthy plants and make sure you give the nutrients your garden needs!